diy: shaped pockets tutorial
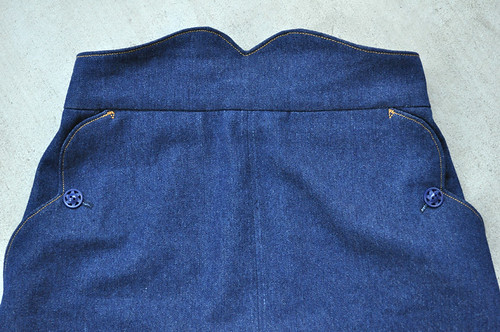
Good morning, friends! Thank you so much for all your sweet words on the skirt I posted Wednesday. Today I’m going to share with you how I drafted those pockets; it’s very easy. Plus it’d be a great way to experiment with various shapes (other than scallops) as well. Shaped side pockets were especially popular in the 50s, when emphasizing the hips was at it’s most popular. But if you would prefer not to draw as much attention to that area, you can always move the pockets closer to the center front of the skirt as well.
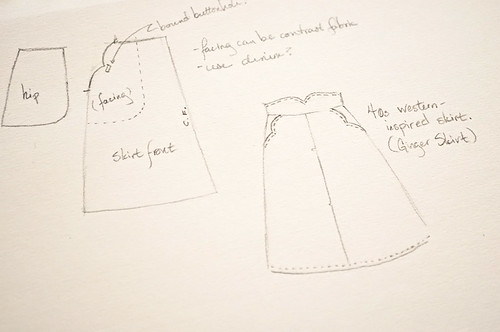
Here is a snapshot of essentially what shapes we’ll be creating (sorry for the quality; it’s just a snapshot from inside my sketchbook!). While I used an a-line skirt, you could use this technique on a pencil skirt, dress skirt or even shorts.
Supplies you’ll need: pattern tracing paper (I use this, but large-sheet tracing paper, non-fusible interfacing or banner paper will work), marker/pencil, paper scissors, straight ruler, and a curved ruler is helpful too. You’ll probably need an extra 1/2 yard of your skirt material too, since you’ll have to cut out the pocket and facing as well.
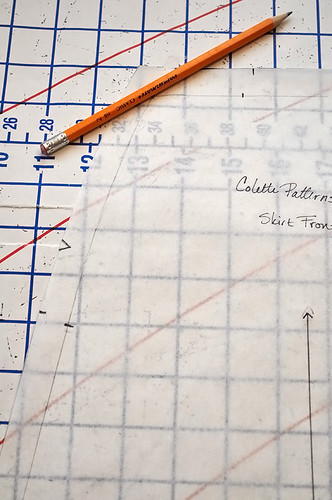
Begin by tracing the front of your skirt piece; we’ll be doing all adjustments on the tracing (you don’t want to ruin your original pattern!). Draw 5/8” from the top and side seam to mark the seam allowance; we’ll be ignoring the seam allowance area while we’re drafting the pattern.
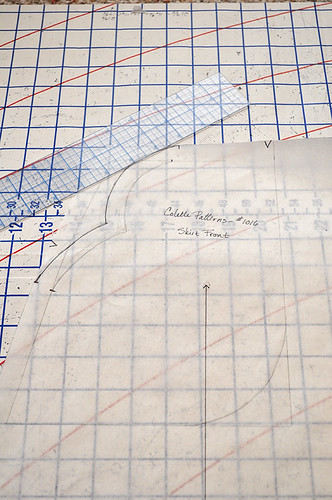
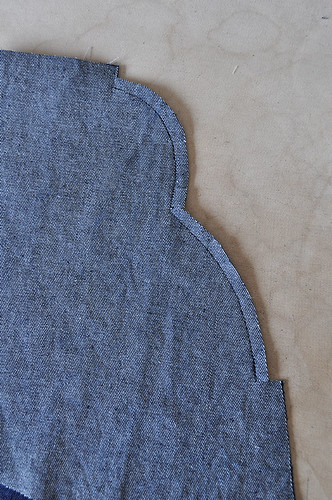
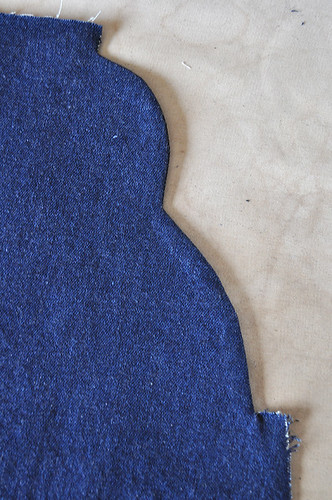
Draw the shape of your pocket. I chose to two scallops since it echoed the waistband curves. I started the opening for my pocket 2” from the seam line and 6” long. Add a seam allowance (5/8”) to these edges, blending it into the existing waistline and side seam allowances.
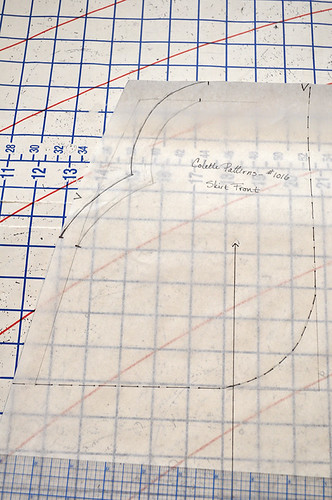
Draw an outline for the pocket pouch; connecting from the waistline to the side seam. I like my pockets deep, so I made mine extend about 4” towards the center front and 6” from the bottom edge of the shaped opening. Use the curved ruler to create a gentle curve along the inner edge. (Read more about drafting pockets here.)
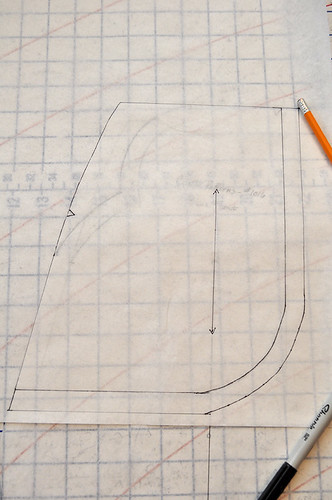
Lay another piece of pattern paper over top the pocket you’ve just drafted. Trace the outline of the original hip and around the pocket pouch. Add a 5/8” seam allowance along the pocket pouch (but not the side seam or waist—since there are already seam allowances included!). Transfer grainline from the skirt piece. Remove and set aside the hip pattern.
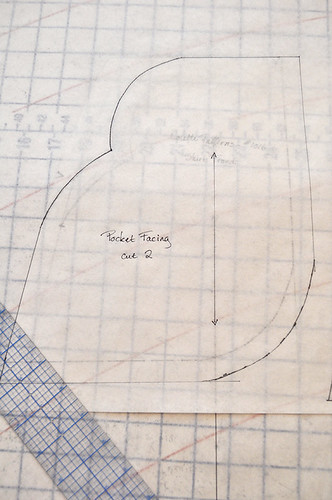
With another piece of pattern paper, Trace the outline of the pocket pouch and shaped pocket opening. Again add seam allowances to the edges of the pocket pouch (bottom and edge facing the center front). Be sure to transfer the grainline from the skirt and remove the tracing paper. Remove the pocket facing piece.
Cut out your fabric: two skirt fronts (or one on fold if that is what your directions require), two hip pieces and two pocket facings.
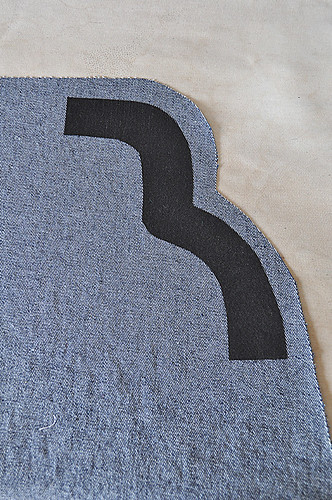
Before you begin sewing the skirt, you’ll need to add the pockets. For my skirt, I wanted to make sure the shaped edges wouldn’t collapse, so I added some fusible interfacing (about 1” wide) along the edges.
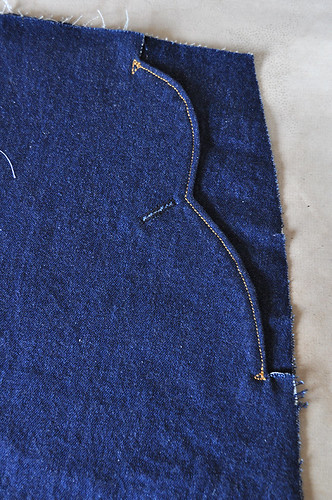
Place the shaped pocket facings right sides together on the skirt front pieces. Sew from the beginning of the scallops to the end. Grade seam along the shaped edge and clip at the beginning and the end to the seam.
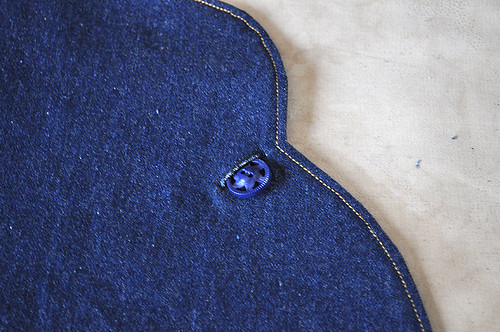
Turn the pocket facing to the wrong side of the skirt front. Press carefully. Baste the free top and side edges together. Add any topstitching along the pocket edge and buttonholes if you wish now.
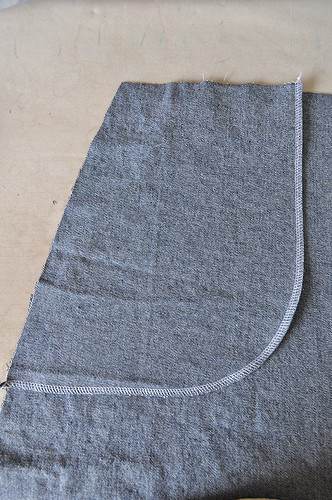
With the wrong side of the skirt facing up, lay the hip piece right side down over top. Match the top and side seam edges. Pin together the pouch edges of the facing and hip pieces together. Stitch together (I just used my serger for this).
I decided to reinforce the opening edges of the pockets on the skirt front (now right side up) with little triangles. I just sewed around them a few times, matching them up with the existing topstitching. Baste the free top and side seam edges together.
Continue sewing your skirt as the pattern directions specify. That’s it for the pockets!
Do let me know if you have any questions about the process; I’ll try and get back to you as soon as I can. Of course as usual, if you try this, I’d love to see your version!


Comments
Post a Comment
Thank you so much for taking time to comment! I LOVE hearing feedback from readers. I welcome truly constructive and thoughtful critique and suggestions, but will not hesitate to delete spam or downright rude comments.