demystifying sleeve ease
The idea of a sleeve ease tutorial was so popular in yesterday's post (thank you all!) that I spent some of my sewing time in the evening putting together a little tutorial. I used the Sense and Sensibility Swing Dress pattern as an example in this post, but this would work for any pattern that has a set-in sleeve and shoulder line that ends at the natural shoulder (in other words, this isn't for a dropped shoulder or any other sort of style). As you will see, it's a super easy adjustment to make--and I'm so glad I figured it out this year because no more crying over set-in sleeves that have too much ease and don't look like the envelope! Hurrah!
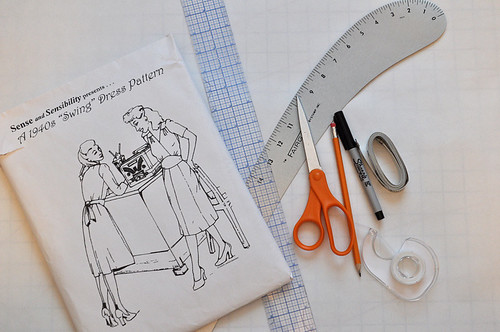
Firstly, you'll need a few supplies: your pattern, tape or pins, a tape measure, pencil, paper scissors, some scratch paper, and a few minutes of time.
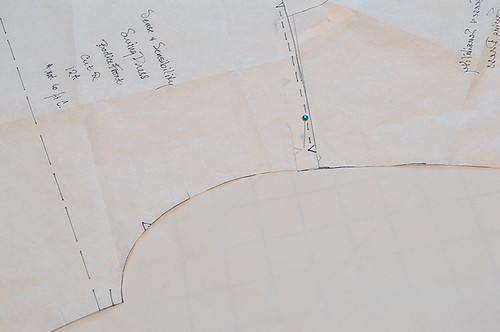
Begin by taping or pinning together the front and back shoulder, overlapping the seam allowances. If your shoulder includes fullness, just ignore it--you want to just establish a smooth line around the armhole.
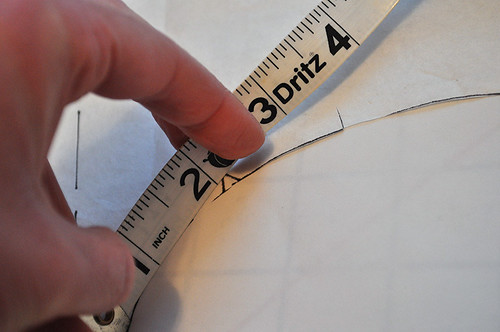
Take your tape measure and measure around the armhole curve. Subtract the front and back underarm seam allowances. Note down this measurement.
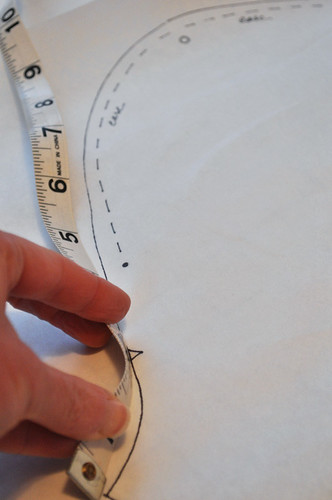
Take the sleeve pattern piece and measure from underarm seam, over the cap, to the opposite underarm seam. Subtract both the underarm seam allowances. Note this measurement down.
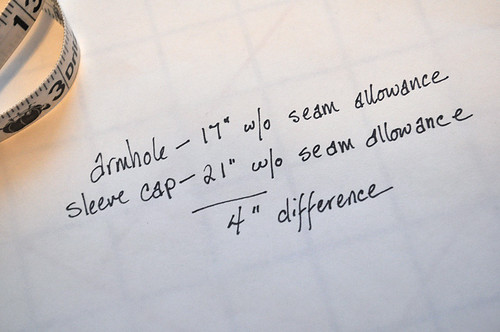
Now compare both the armhole and cap measurements. Sleeve caps that are set-in should have about 2" of ease in addition to the armhole measurement (although I like slightly less if I'm using a synthetic or difficult to ease/shrink fabric) at maximum. Any more and you'll get gathers rather than barely-there ease. The goal is to have some extra fabric to help give the cap a gently curved shape to fit over the shoulder, but the ease should be hidden in the seam allowance and not show up on the cap once sewn. If your cap has more than 2", note this difference down.

Begin by reshaping the cap with the pencil. I'd suggest tracing the sleeve pattern first if you don't want to do this on the actual pattern. I freehand this, but you could also use a curved ruler. I always start by taking off excess at the top of the cap and then the sides--the goal is not to take off so much that either the cap is distorted or too tight.
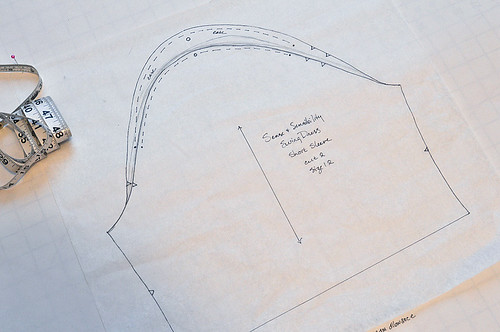
You will want to remeasure the newly drawn cap (don't cut it out yet!) with the tape measure as you go. Once you get to that armhole + 2" ease measurement, stop. Look at the sleeve cap and compare it to the original to make sure it hasn't been distorted. Make sure to transfer all markings (dots, notches, etc.) within the new sleeve cap seam allowance.
Cut along the new cap line and you're ready to go! I'd recommend doing a muslin if you're unsure as to your changes. Sometimes a cap is tricky and it takes a couple tries, but this technique really helps eliminate some of those fitting frustrations with sewing sleeves!


Comments
Post a Comment
Thank you so much for taking time to comment! I LOVE hearing feedback from readers. I welcome truly constructive and thoughtful critique and suggestions, but will not hesitate to delete spam or downright rude comments.